Abby's Guide to Plasma TVs
Username Password
Home Discussions Reviews More Guides

Member Profile


eleckster

Name Tim
Email Address private
AIM
YIM
ICQ
Gender
Age
Location Saint Anthony Village, MN
Personal Quote
Privileges Normal user
Rank
Points 5
Number of Posts 5
Number of Reviews 0
Date Joined Dec 22, 2012
Date Last Access Jan 9, 2013 11:26 pm
eleckster's last  
Re: Aftermarket Carbs
#1   Jan 2, 2013 1:00 pm

The replacement carb is Oregon 50-642.  I like the brass seat with rubber needle.  That setup, in my experience, is more reliable.  I work on half a dozen small engines a year so the small number could lead me in the wrong direction.


The Oregon carb has a plastic float that is very difficult to adjust, as the metal tab that holds the seat clip breaks off if much force is applied.  I’m thinking that I may swap in the brass OEM float if it fit and see how that works.


There are probably more failures caused by me than can be blamed on the design.  The seat is installed with the rib facing down.  I do not have the tool.  I asked the dealer for the tool but they did not stock it.  Currently I’m using a transfer punch with the end buffed smooth, which is just slightly smaller than the hole for the seat. I recently read a reference in “Small Gas Engine Repair” by Paul Dempsey, to be sure there is a fuel shut off if the seat is elastomer as they leak.  This made me feel better as misery loves company.


I have had some carbs fix themselves by running.  I’m guessing that the seat settled in.  I’ve also slowed the leak down by adjusting the float so that it is a little higher than flush.  My theory is that as it over fills it puts more pressure on the seat.


I’ve read that there is an orientation to the clip that holds the needle, however I can’t figure out why this is? It looks like it will operate the same either direction.  I forgot what the orientation is, but if I knew I probably would put it in wrong to see if it caused a problem that could be fixed by turning it around.  I have turned it around trying to fix a leak with no success.


What if you took the OEM needle and lapped, or peened it into the brass seat?


Obviously I suffer as well from the questioning issue as well:-)

Re: Aftermarket Carbs
#2   Jan 1, 2013 8:58 pm
I just bought an Oregon replacement carb for a Tecumseh HM80. The seat is brass and the needle has a rubber tip on it, the opposite is the OEM carb . I have never had good luck replacing the rubber seat. Don't get it seated correctly and gas leaks by resulting in in a pool of gas on the floor if you forget to shut off the gas line valve.


 I installed the carb today and found that it was a little touchier to adjust than I am used to. I put it on a blower I just picked up and did not put a lot of time in to it so it may have other problems, but it did run ok with the new carb. I went out to the garage later and there was a pool of gas on the floor below the carb.


 I need to put some time in and figure out what's wrong. I am still hopefull that the needle and seat design on the Oregon will work better.
Re: Weld up all the seams on the bucket?
#3   Dec 25, 2012 7:12 pm

Merry Christmas everyone.


Body work is lower on my list of things I like to work on, but it needs to be done before I move on. I did just get a wire feed so I am itching to use it. Higher on the list is performance so if I stick with this project, more power will be added and welding would add strength as well as seal the seams up.


My auto body buddy says any place I weld a seam to spray it with a lot of weld thru primer so it soaks all the way in. Weld it up and then clean off any exposed primer, as it is better at protecting the hidden area, than as a primer under paint.


jrtrebor, that looks great. I saw the post on your Honda re-power. I’m dreaming of a v-twin, Honda or Vanguard, but first things first.


I never thought about flushing out the salty snow, but I will be doing that from now on. My new house is on a cul-de-sac so I get an extra large pile at the EOD.


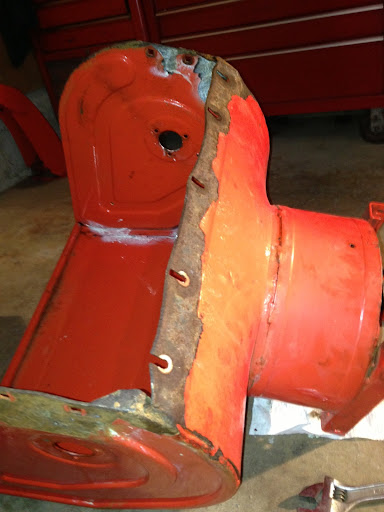
This rust appears to be from sitting in a pool of the salt water. I have an Ariens ST504 that I redid the bucket on 7 years ago. More often than not I fog it with some oil that I have laying around after I dry it out with a heater. It has very little rust on it.


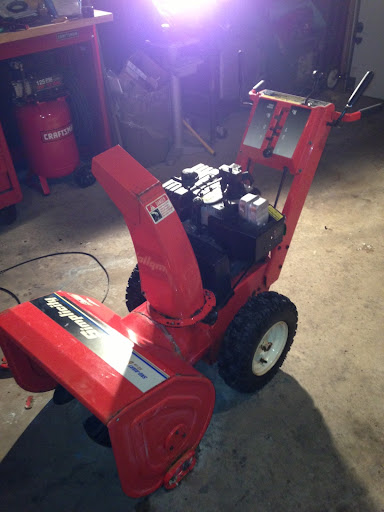
I do like the solid feel and looks of the handle on the Simplicity enough to pay more than it probably was worth. I was looking for a Gilson as it would match my tiller and looks even more solid, however it appeared that the parts are harder to find.


I like the idea of welding on a piece of metal to the shoes. I was just going to flip the shoes to the unused side but I will probably weld a piece on the wore down side.


Currently I'm thinking I will weld up some areas I think will add strength. I’m not sure about sealing the seams. Ill have to have a couple of beers in the garage and think about it.


Thanks for all the advice.

Re: Weld up all the seams on the bucket?
#4   Dec 23, 2012 10:08 pm
That's a good point. I guess I'll have to find some other part to put more time into than I should. Thanks
Weld up all the seams on the bucket?
#5   Dec 23, 2012 10:24 am
Hi all, first post.

I moved to a new house with a bigger driveway this year and decided that I needed a bigger snow blower.  I picked up a Simplicity 860 and pulled it apart.  The bucket has some rust on the bottom and I will need to cut out the area that the cutting edge bolts to and weld in new. Ill then have it blasted and repaint.

So while I have the welder running, I'm thinking of welding up all the seams on the bucket that are currently stitched in.  Other than taking time, and the possibility of warping the metal if done incorrectly, is there any reason I should not do this?


Plasma TVs Guide   •   Discussions  Reviews  
AbbysGuide.com   About Us   Terms of Use   Privacy Policy   Contact Us
Copyright 1998-2024 AbbysGuide.com. All rights reserved.
Site by Take 42